A cutting-edge project that explores the power of Generative AI models in various computer vision tasks, including spoof detection, visual search, image generation, and product mockup creation. By leveraging Vision Transformers (ViT), CLIP, and Stable Diffusion, this project showcases the capabilities of AI in security, content creation, and e-commerce.
Following will be the explored problems and how this project addresses them:
- Spoof Detection: Uses a ViT-based model to detect fraudulent attempts in face authentication systems.
- AI-Powered Visual Search: Implements OpenAI’s CLIP to retrieve the most relevant images based on a text query.
- Stable Diffusion Image Generation: Explores how different prompts and parameters affect AI-generated artwork.
Part 1: Spoof Detection
The purpose of this part is to train a Vision Transformer (ViT), that is capable of detecting fake/spoof images. This would be particularly useful in detecting/pushing-back attackers that try to bypass AI-powered facial authentication systems.
Dataset Acquisition and Analysis
The real/spoof image dataset was downloaded from Hugging Face from this respective repository: nguyenkhoa/celeba-spoof-for-face-antispoofing-test. Hugging Face’s datasets package was used to fetch and load this dataset.
Data Analysis
The dataset consists of about 67K images labeled as either ‘live’ or ‘spoof’:
Each sample in the dataset is present in the following structure:
{
 'cropped_image': <PIL.PngImagePlugin.PngImageFile image mode=RGB size=172x267>,
 'labels': 1,
 'labelNames': 'spoof'
}
Each image has a different size and thus we’ll need to preprocess the images later.
The visualization of original images is as follows:

Loading Vision Transformer and Preprocessing Images
Google’s ViT: google/vit-base-patch16-224-in21k with a patch size of 16 and input image size of 224x224 is chosen for our task. This is because this base transformer is pre-trained on a diverse image dataset and would respond to our task-in-hand quite effectively.
AutoImageProcessor module of the transformers package was used to efficiently convert the input images into the required shape of our selected ViT. It also effectively normalized the image pixel to a range [0, 1].
After transformation, the images were converted to tensors with each image having a shape: (3, 224, 224).
Data Splitting
The data-set was further split into a 80/10/10 fashion with:
- 80% of data for Training → ~53,429 images
- 10% of data for Validation → ~6,679 images
- 10% of data for Test → ~6,679 images
Fine-tuning Vision Transformer (ViT)
google/vit-base-patch16-224-in21k was initialized as our base ViT with classification/num_labels or number of neurons in the last dense layer set as 2 (live/spoof).
The following hyperparameters were used for the fine-tuning:
- batch_size = 64
- learning_rate =
- epochs = 5
AdamW was used as the optimizer and CrossEntropyLoss (CE) as the loss function.
Results and Visualizations
Following were the results of the fine-tuning:
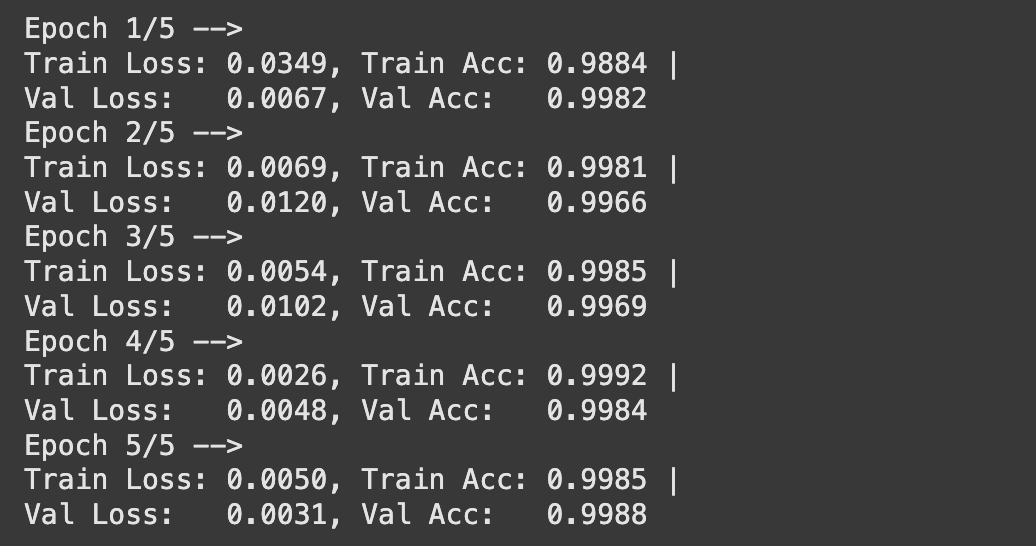
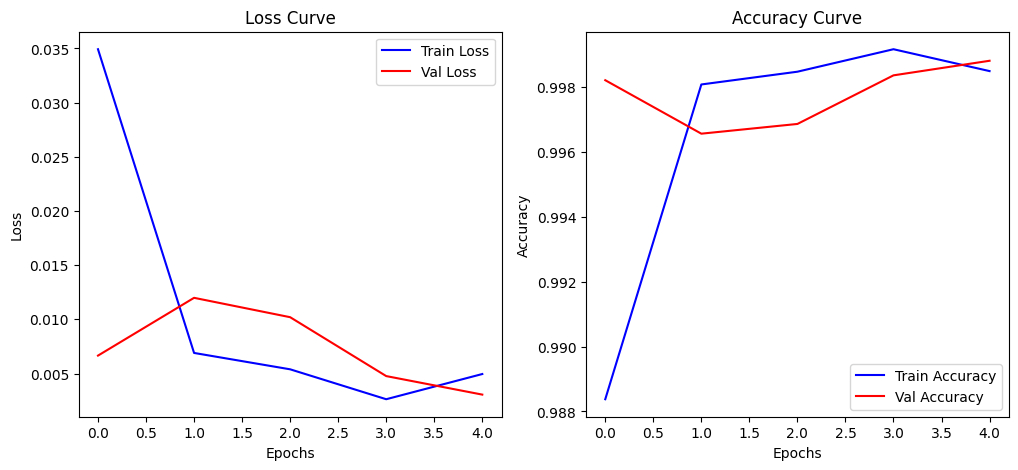
Following are the visualized accuracy and loss curves:
Evaluation Metrics / Testing
On test data, which has about 6,679 images, following were the results of our fine-tuned model:

Custom Image Testing
I used my own real and spoofed image to test the quality of the fine-tuned model and following were the results:
| Custom Image Type | Custom Image | Inference |
|---|---|---|
| Real |  |  |
| Spoof |  |  |
Good to Know
The spoof image is in-actual the real image captured through a mobile phone.
Given the results, it seems like the model is able to correctly predict a real-world scenario.
Part 2: AI-Powered Visual Search
In this part, we will build a Visual Search Engine which would fetch the relevant images for us given a textual prompt. For this, we would need to correctly catch the sentiments of the textual prompt and map that to the corresponding images to get the best match.
For this purpose, we would utilize Open AI’s CLIP model, specifically the one running on a Vision Transformer backbone.
Data Acquisition and Analysis
We would first need a dataset of images from which we would query though text.
For this, the we will use the COCO (Common Objects in Context) dataset. Its a large-scale object detection, segmentation, and captioning dataset which would be perfect for out current need.
However, since the actual training COCO dataset have many images (80K+), we will use the COCO val dataset, which has only about 5K images. This would make our search space a little small and thus would make the inference fast. The process/code however would be the same if we are to use any larger image dataset.
The annotations/captions of the images were also downloaded in-order to match and relate the relationships between the words and the images.
Following are the structure of the captions:
{
 'image_id': 179765,
 'id': 38,
 'caption': 'A black Honda motorcycle parked in front of a garage.'
}
The image_id is the numerical id as well as the name of the corresponding image which is downloaded earlier through the dataset and stored in the file system.
Image Query Pipeline
In order to entertain a textual query or get the relevant images for the given text, the following steps are followed:
- The textual prompt is first encoded into a latent space through the CLIP model
- For each image in the
image_datasetor the image search space:- Features of the image are encoded into the same latent space by the CLIP model
- A dot product is taken of both, the textual prompt encoding and the image encoding.
- This dot product would essentially act as the similarity between the image and the actual prompt that is being queried
- The dot product is stored in a list for a later analysis
- Finally, the top
Kimages are fetched which gave the higher similarity scores- These images are the actual result that user wanted through the query
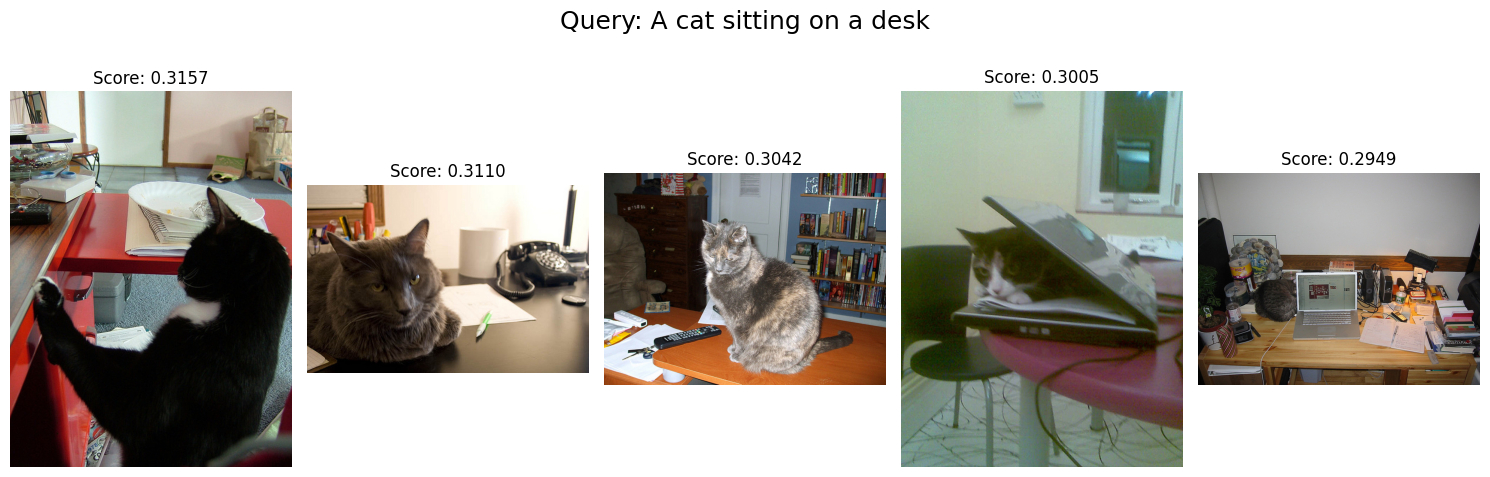
Example Query Sample
Following is the result of a random query which was given to the model:
Part 3: Stable Diffusion
In this part, we will utilize the Stable Diffusion models for image to image and text to image generation. Further different hyperparameters will also be tested to see how the generated images are affected.
Image2Image Pipeline
We will first perform an image to image generation and for that we will work with the dreamlike-art/dreamlike-photoreal-2.0 pre-trained Stable Diffusion model.
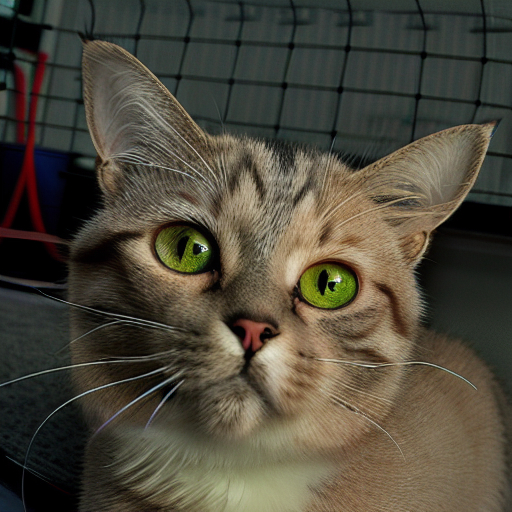
The input image which we will be using for image to image generation and variational prompting will be:
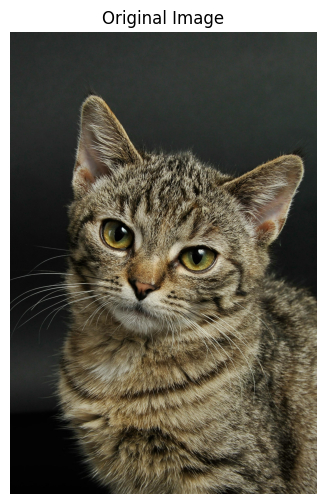
This above input image will be resized to an appropriate shape which could be accepted by our Diffusion model. In our case, we resized it to (512, 512).
As for the image to image generation, the input image was first converted into the RGB format and then given to the model. The prompt which we gave to the model to generate a variational version of this image is: Generate an anime version of this cat. Following is the resultant image generated by the model:
The result is good. Now let us tinker with generational hyperparameters.
Experimenting with Generational Parameters
We can tinker with the following parameters:
strengthguidance_scalenum_inference_steps
Each of these parameters play an important role in the image generation.
Following are the results for different combinations of these parameters, while keeping the same prompt: Generate an anime version of this cat:
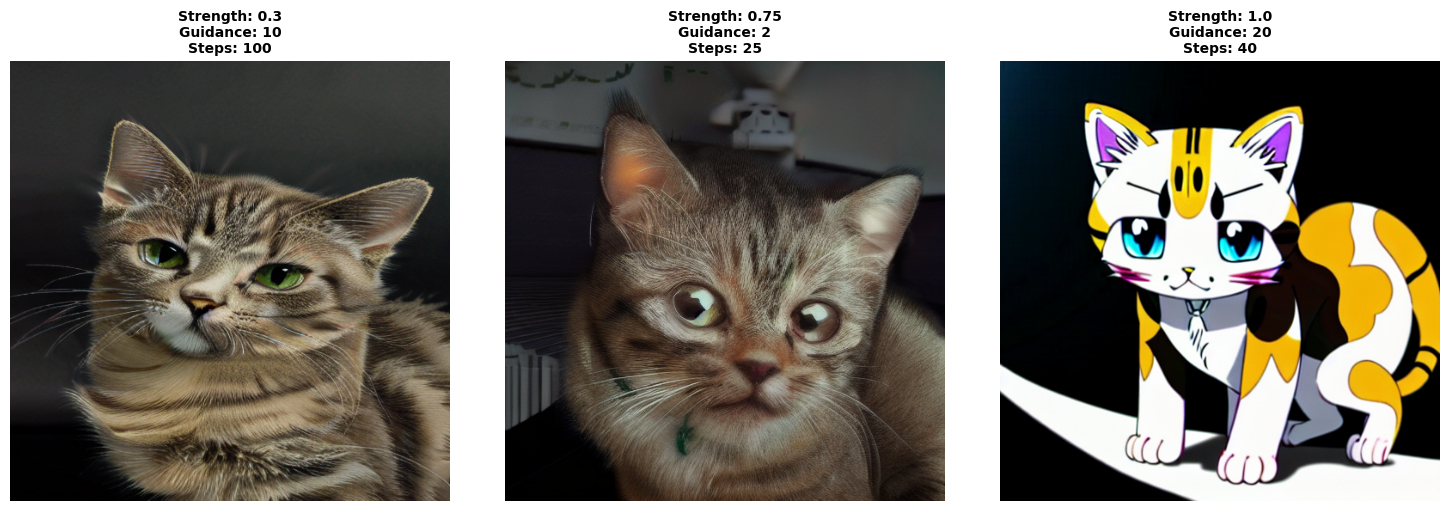
As we can see, putting strength to a minimum value would force the model to be less creative and stick to the original image, retaining the original features and environment. In the first image in the above collage, we can see this in work. When putting strength to a lower count: 0.3, the model generated an anime cat image which retains a striking resemblance to the original cat image provided. Only the eyes of the cat were different.
In the second image of the above collage, we increased the strength back for the model to be more creative but the guidance_scale was limited to just 2. This we can see have affected the model the ‘realism’ of the generated image. The image indeed does look like that of a cat’s but some elements such as eyes are unrealistic.
In the last image of the collage, we increased strength to maximum: 1.0, gave a high guidance_scale: 20 and the num_inference_steps was given as 40. This gave us a perfect anime version of the cat, however details of the original image such as eye color and cat’s body color were no longer present now.
From this we can infer that a higher num_inference_steps parameter allows the model to work on the generated image more and more.
Prompt Engineering and Analysis
We then worked with various prompts for the same given input image and following were the results:
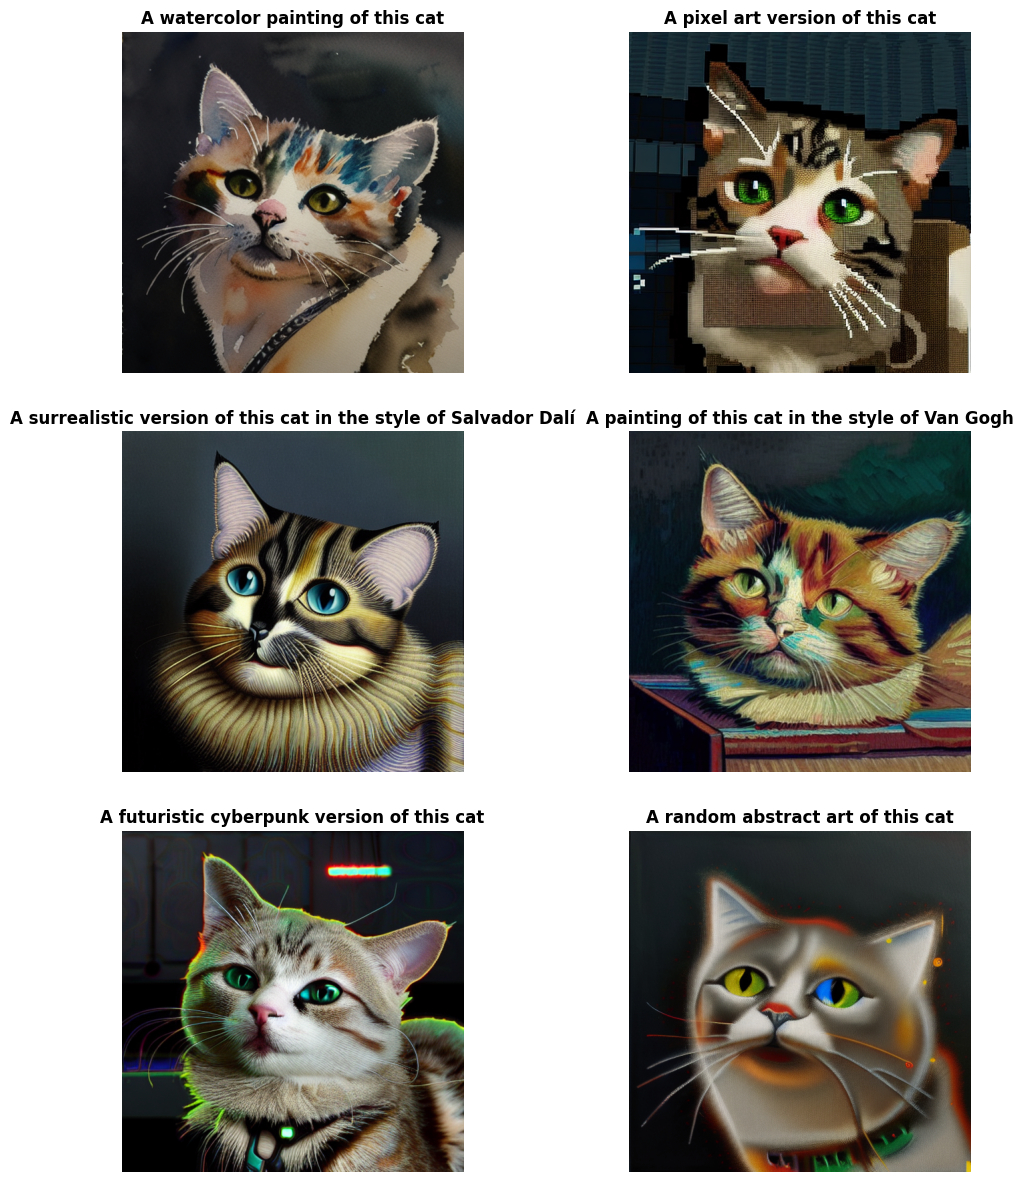
Info
All of these inferences were done with the default values of the above tested input parameters.
We can see some great results especially with the watercolor, pixel art and painting versions of the cat. The pixel art version though seems highly resembling to the original image and thus proves to be more accurate.
From this we can infer that Stable Diffusion is able to correctly understand various prompts. It clears known how pixel art or watercolor images work and has perfectly blended the original input images to those image styles.
Text2Image Pipeline
For a little experiment, the text to image pipeline was also tested in-order to understand the generation quality of images. For this the stabilityai/stable-diffusion-2-1 model was utilized.
Following were the results of some arbitrary prompts:
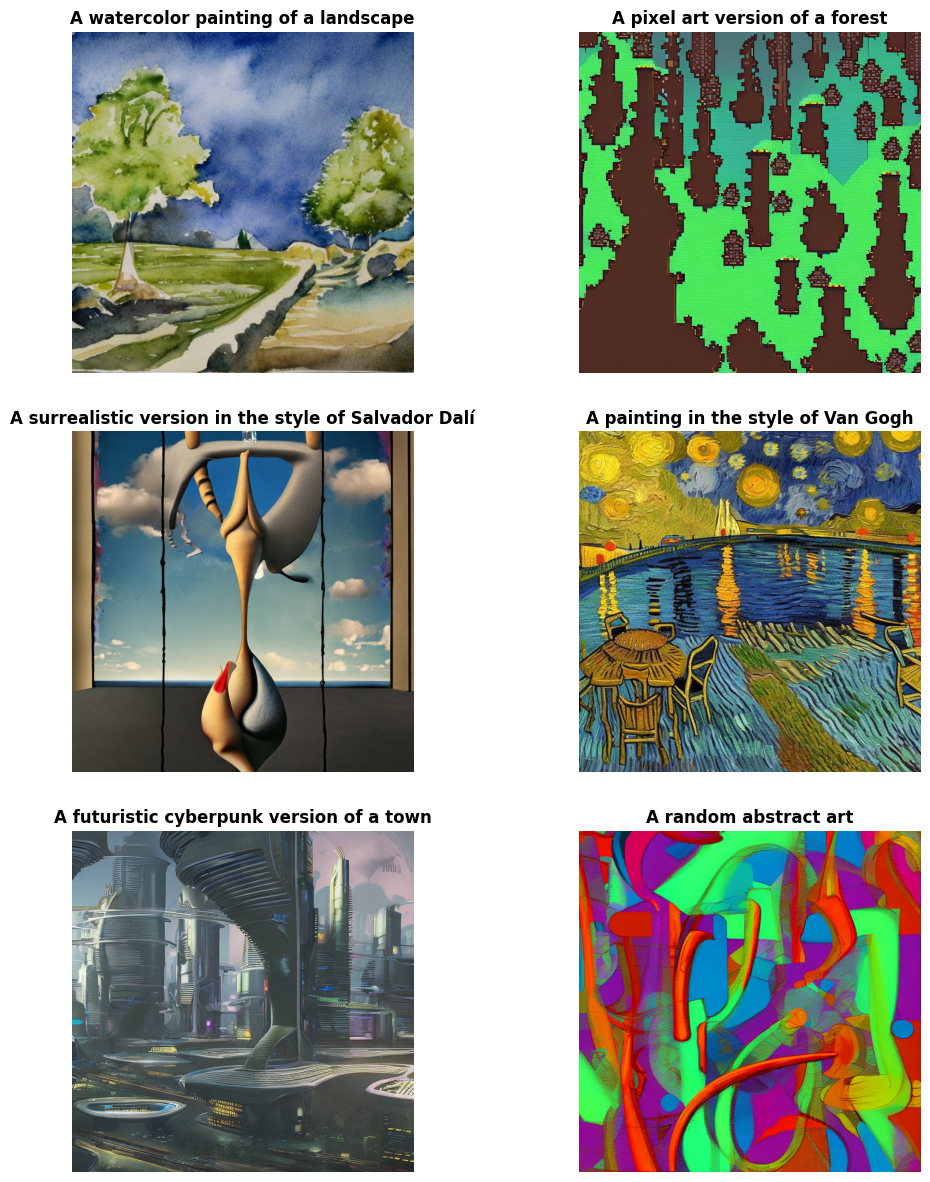
We can see some great results, especially for the cyberpunk version of the town and the painting in style of Van Gogh.